
You've probably heard the term UV printing, but what is UV printing, and how does it differ from other types of printing? Read on, and we'll explain what it's for and how we use it to create a range of bright, durable, and beautiful personalised products!
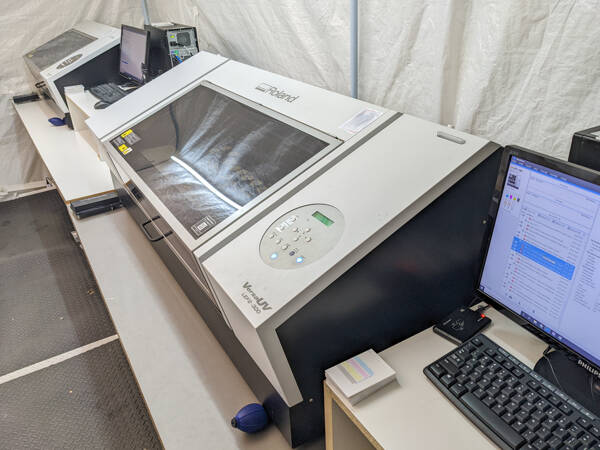
We're fortunate to have two UV printers in house. We've chosen to go with Roland units; they're considered top of the line and are designed for accurate, vibrant, and continuous production work. We've been running these since October 2019 and it's brought so much to our existing products and to new products.

On the outside, what could be so hard about UV printing? As with all technologies, it's all about using the machines within their limitations and features to end up with a perfect and beautiful result - so naturally a few compromises need to be made. But it's all worth it in the end!
To help you understand what UV printing is, the challenges involved in it, and why its worth all the effort, we've written a detailed description below. Strap in - it's going to get technical and detailed!
You're probably familiar with your home inkjet printer, and a UV printer is quite similar in basic operation. So let's break it down simply in terms of what it does.
Basically, a print head, with thousands of microscopic nozzles, precisely deposits ink somewhere onto your print medium (what you're printing onto). Internally, they often use a piezo-electric device to precisely release a certain amount of ink out of the nozzle onto the medium. The print head itself, the most delicate part of the printer, is physically moved left to right across the item to be printed on, and as it does so, releases ink in a precise pattern to make up the image that we're printing - effectively printing a wide strip at a time. The printer then feeds the paper (or in our case, moves the item being printed on) through the printer to make up the pattern.
Now we get onto the complicated parts! The first part is printing in colour. What actually happens here is that printers generally print with several ink colours - almost always in CYMK (Cyan, Yellow, Magenta, and Black (K) - this is the industry standard). The printer doesn't mix the colours together before they come out of the nozzle; instead, it prints microscopic dots next of each colour to each other, and they mix together by being right next to each other. By varying the dot pattern and the amount of ink, the printer can create a wide variety of colours!
The next part is the resolution of the print heads - this is just how small and how close together the dots can be printed. Your home inkjet printers should do at least 300dpi, but many go much higher. 300dpi is a generally accepted minimum resolution to reproduce a photo nicely, but more resolution is always better! All printers vary in the resolution they can do based on their physical hardware. Our UV printers can go up to 1440dpi, but in practice, we often use them at 720dpi as this is more than enough even for the smallest earrings.
And now onto curing! The inks are a liquid as this can be easily pumped around by the printer. In the case of your home inkjet printer, the ink is often water based, so once on the paper, the water dries out of the ink, and it's set on the paper. This is also why your home inkjet printed photo will run if it gets wet; the water will dissolve the ink and move it to a new location!
This is one of the major places where UV printers differ. Instead of having a water based ink that dries, instead they contain special solvents that don't air dry. Instead, when the solvent is exposed to UV light of a specific wavelength depending on the ink, the solvent expands and evaporates, leaving just the ink behind on the surface. The UV lamps are mounted right next to the print heads and move with the print heads; they expose the ink right after it's put down on the material. The ink generally cures hard and bonds to the surface it's been printed on. The solvent is released into the air, and is captured by an activated carbon air filtration system.
A result of this is that the UV print can't be washed off with water or even isopropyl alcohol - it requires special solvents to dissolve and remove it - making it much more durable. Acetone will dissolve the ink, but acetone also dissolves acrylic too! Also, the ink bonds to a wide variety of surfaces that your normal inkjet ink isn't suitable to bond to - like high gloss and smooth surfaces like acrylic.
The ink also bonds really well to wood surfaces too. In this case, the ink does soak in slightly before curing, making the ink almost part of the wood. If printing on raw wood, you'll need to sand it back thoroughly to remove the ink.
And that's the short version of how a UV printer works!
Your home inkjet printer is designed to print on paper - something with a consistent size, and something that's thin and flexible and can move through the internal rollers. The paper is often bent through rollers in the printer to get it into just the right spot for the print heads; you'll note that thicker card can't easily move through a home inkjet printer.
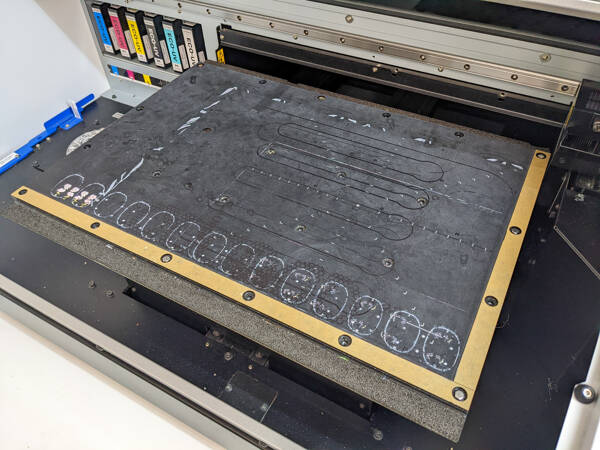
A UV printer generally has a flat bed, that you place your items to be printed on. You can't really bend acrylic or wood pieces to get it through printer rollers, so instead they sit on the flat bed of the printer. The printer then moves the print heads over the table, and moves the table as needed, to print in the right location.
Combined with the UV inks, this then allows us to print on hard surfaces like acrylic, or wood, in a durable way. There are other ways to make a durable mark on various surfaces, and UV printing is considered a reliable way to do this for many applications. It's not suitable for all surfaces, as like any ink or paint, it bonds well to certain surfaces, but not others. But where it's suitable, it's a fantastic and quick way to personalise many items!
UV printers often have several special features that give us some incredible capabilities for printing on hard surfaces. Here are a few of them!
UV printers are almost always equipped with white ink. But why, you might ask?
Let's explain this one with an example. Let's say you have some white paper, and a red marker, and a blue marker. If you draw on the paper with the blue marker, you get a blue mark. If you then draw over the blue marker with a red marker, you should have a purple mark on the paper.
But now, let's suppose you have some blue colour paper. And then you draw on that with the red marker; you have a purple mark on the paper - but you didn't use any blue marker. But what if you really wanted a red mark on the blue paper? The simplest solution is to use some white paint first to make that part of the paper white, and then put red over the top of the white paint.
We often print on things that are not white. The colour inks in the printer have good coverage, but to allow them to mix correctly, they are somewhat translucent. They work properly when printed on white, but won't give the correct colours if printed on something that is not white.
So the printer is equipped with white ink, to print underneath (or on top of!) other colours to get their colours correct. A great example is printing on wood - to print colours accurately on wood, you print precisely under the original print with white, and then print the colour on top of this layer. The result is a vibrant, full colour print, with the wood visible around the print.
The other main use for this one is to print on clear acrylic. The ink, when printed, has a matte or satin finish; not a gloss finish. This works for a wide variety of things, but sometimes, we just love gloss finishes! So, we often print on the back of clear acrylic. You then view the print through the clear acrylic, giving it a beautiful high gloss finish. This becomes possible when we can print white on the back of the colour printing, as otherwise the colour will look extremely faded.
As mentioned in the previous section, UV printed ink has a matte or satin finish; not a gloss finish. Many printers are equipped with a gloss varnish that they can print over the top of the printing to give it more durability and a lovely gloss finish.
There are other applications for this; for example, some people use the gloss ink in several layers to make things like braille signs, as each layer is approximately 0.1mm thick, so by building them up they can make a raised surface in a special pattern.
Gloss varnish has a few limitations though. It has to be done as a separate pass in the printer, and takes three times as long to print as anything else. The other limitation is dust - the tiniest speck of dust will ruin the gloss finish. Despite our best efforts and the extensive dust control measures we've put in place around our printers, we've never been able to get it fully dust free to be able to effectively use this feature, so doing a gloss varnish with the printer isn't a service that we offer.
However, we prefer to make the resulting print glossy in other ways! For wood items, we often apply a semi-gloss (30%) lacquer after printing, which results in vibrant and stunning wood items. For acrylic items, we can in some cases apply a resin coating afterwards to make the print durable and beautifully glossy. This protects and enhances the print, but does depend on the shape of the acrylic!
The more common way to get a gloss finish is to print on the back of clear acrylic, and then view the print through the acrylic. We use this technique all the time with great success.
The UV ink applies and bonds really well to a wide variety of surfaces. But some surfaces don't hold the ink as well as they should. Our printers are equipped with a special primer ink that can be printed down before other inks, and significantly improve the ink adhesion to a number of surfaces.
We regularly use the primer on acrylic to improve the strength of the print. This is also essential for our cut-print-cut methods, where we cut blanks, print them, and then reprocess them through the laser, to be able to get beautiful bleed print results - more on this later!
Like any printed item, there are limits to what you can do with it! Like, for example, you can't get prints from your home inkjet printer wet as the ink will run. Contrast this with a laser printer, where the prints won't run if you get them wet, but you'll still happily destroy the paper in the process. What am I trying to say? You've got to use the right technology for the job.
We've listed some of the main limitations below. In every case, it's a matter of creating the items based on how they will be used, to ensure they will last and look beautiful for years to come.
The main thing that can disturb UV printed items is mechanical abrasion. In laymans terms - scratching off the ink! When we print onto wood, the ink soaks slightly into the wood, and we've found that it often soaks in far enough on our veneers that you can't remove the print without removing all of the veneer. On hard surfaces like acrylic, it bonds extremely well, but if you get onto it with a metal tool like tweezers, you will scratch it off! It's not easy, but it's still a risk.
For this reason, UV printing on acrylic works amazingly for earrings, where you don't handle them that often, and they're not rubbing against hard or sharp items. It does not work well for keychains, as the print will be up against keys and other things in your pockets. In our testing, printed keychains without any protection last a few months before the print finally starts coming off - and for this reason we don't offer keychains in this manner, as we'd rather see our products last longer!
There are ways to manage this though!
Applying the primer ink before printing (as mentioned before) significantly improves the resistance of the ink, and makes it much harder to remove.
Another alternative is to apply a clear resin to the top of the print, which protects the print and also enhances the colours of the print. This is a great solution for coasters or keychains made on acrylic; we can offer this with our wholesale products. The resin application (and we use a two part curing resin) is a whole art and science in itself, but we do have the capabilities in house to do this.
But don't let this hold you back - for the vast majority of items we produce, it's not an issue at all!
How about colour fastness? The manufacturer states that the colours are suitable for 12 months exposure outdoor. After this time, they will start to degrade, as all inks do - every type of ink is rated for a certain quantity of time in full sunlight. But what about for indoor use? It depends on how much UV light they're exposed to. In practice, items stored or used indoors should last practically forever, as they require a lot of UV energy to degrade the inks.
The manufacturer does say that the colour fastness depends on what material that you are printing on, and won't guarantee the specific length of time it will last, as they don't control what we print onto. Acrylic is generally accepted as durable material; it's often rated for 30 years in full sunlight before degrading as it's a common choice for outdoor signs.
In practice - for anything used indoors, we would expect printed items to last for many decades to come.
As mentioned before, one of the common things to do is print on the back of clear acrylic to have a gloss finish for the print, which we do for earrings all the time. You might then be tempted to glue a stud to the back of this, to end up with an earring.
So far, we've not found found a suitable glue that won't affect the print surface, for bonding to metal or similar small surfaces. You might be able to test and find one! Most of the glues required for gluing metal to acrylic (like E6000 or similar) are too aggressive and will dissolve or affect the print, when directly applied to the print surface. (The glues won't have an effect when applied to the reverse side). But there is a world of glues out there and there might be some that are suitable!
PVA glue won't affect the print surface due to it being water based, and can be used depending on what you're gluing it to.
We often use a sign grade double sided tape on the back of the print, which is really useful for applying a custom colour printed acrylic to signs. The double sided tape works well for acrylic-to-acrylic surfaces, or for putting the print on sealed wood surfaces. Unfortunately, it doesn't work well for printed surfaces onto metal parts, and it needs to be a certain size to get a good bond. So this one isn't suitable for earring studs, but is suitable for many other applications!
In this scenario, we normally recommend printing on the front of white acrylic, which leaves a clean surface on the back to apply a strong glue for attaching metal components. If you're keen for the gloss finish on the front, resin can be applied to give this a nice finish, which we can do in house for larger batches of items.
But don't be put off by these limitations - there are limitations with all materials that are different. It's a matter of being aware of these limitations and using UV printing where it really shines!
So far, this all sounds really easy, doesn't it? Design it on a computer, toss it into the printer, and all of a sudden we've got our items printed! But like all things in life worth doing, UV printing is a balance between the materials and the technology to accomplish the desired result!
So here are some of the major challenges we work through on a daily basis to get the perfect result for your items!
The item you're printing on needs to be flat, and flat to the bed of the printer. The print heads whizz along at high speed over the table, and are just 1.0mm above the surface that you're printing on. If anything pokes up, it'll get into the path of the delicate print heads. And if the heads are any further away, they won't be able to precisely print onto the surface. To put this in perspective - the print heads are moving so fast, that by the time the droplet of ink hits the surface, the head has already moved on from that location and it's dropping the next droplets of ink. If the print head is any further away, the ink droplet can drift from air movements inside the machine and land somewhere else! (This happens anyway - the printers are equipped with mist fans that catch as much of this as possible).
So how do we manage this? The first part - how far the print heads are from the surface of the material - is handled by having a Z adjustment - that's height. The printer bed can be moved up and down to get the material at precisely the right height; this allows us to print things with different thicknesses, like moving between 2mm thick acrylic, 3mm thick acrylic, or 4mm thick wood veneers - or up to 100mm thick for our printers - allowing us to print on some boxes! This is set up before the print run; the printer has a sensor and can in most cases automatically detect the height of what you're printing on.
Most of the things to be printed are heavy enough that they'll stay in place as the print heads whizz along the surface. But sometimes, they're not, or they're unbalanced in such a way that they bend when you print on one side. One of our printers - the larger LEF2-300 printer - is equipped with a vacuum table to hold down thin or light materials. How does this work? Tiny little holes have been put in the table, and a small vacuum pump draws air through these holes. When you place something over the holes like what you're printing on, it sucks down onto the table. This technique is used on many different industrial machines to keep things in place quickly and easily.
The printer has a sensor bar just behind the print heads, and the material is moved past this bar before printing, to make sure that nothing is in the way of the print head. However, this sensor is incredibly sensitive; we had to tune our machines to allow an extra 0.2mm movement. Also, this sensor bar, when triggered, does one of two things - it can either abort the print run to protect the heads, or it can do a minor table adjustment and continue printing. We've configured it to adjust the table slightly and continue printing, but we've configured the printer to only move up to 1mm higher than it was originally set - this handles small inconsistencies in the materials, but any more than this would be something going wrong, and the printer aborts to protect itself, usually meaning we need to restart the job with a fresh piece.
Still with me, or have your eyes glazed over? I won't judge, don't worry!
In a standard inkjet printer, when printing on A4 paper, the printer has some knowledge of where the paper is and when it starts. The printer will know where the left edge of the paper is as the machine is designed to always have this in a certain spot, and it knows where the top of the paper is as it has a sensor that detects when the paper moves through the rollers.
But the UV printer does not have these sensors. Instead, the whole bed is the print surface. One specific spot of the print bed is the origin - that is, the start of where it will print. The origin is the zero location - the print co-ordinates of this location is 0mm, 0mm. (The two numbers are the X and Y location; the X axis goes left to right and increases towards the right; as in 0mm is the left, and for example, on our LEF2-200, 505mm is on the right. In the case of Y, it's the distance from the front to the back; 0mm is the top, and 330mm is the bottom.)
Anyway, enough mind bending! Back to where we were. Lining things up in the printer. Basically, you tell the printer the exact X and Y location you want to print the artwork, and the printer will move itself to this location and print there. But where is 0, 0? The printers come with a flat table by default. The smaller printer (LEF2-200) has a thin line engraved on the bed to show the origin location. The bigger printer (LEF2-300) does not; instead it has a tiny little engraved square that shows where the origin is.
These origins were not reliable enough for our work. A lot of our earring work needs to be precisely positioned - down to as little as 0.05mm. For this reason, we've added specialised jigs to each printer that has a tiny 1mm lip at the origin location. This allows us to push the item to be printed up against the origin, and we know that will be 0, 0. The little lip allows us to print on materials as thin as 2mm thick.

But it's still not that simple! If we're printing earrings, they're often not square; so they can't just be pushed into the origin corner. Plus, we laser cut the pieces out, and while the machines are incredibly precise, the cut pieces are around 0.15mm smaller than we programmed them due to the laser cutters kerf (thickness of the cut).
So for earrings, we mostly manufacture a special jig for each design - we call this the SMP with Jig method (sub-millimeter positioning). The jig has a hole in a precise location for each earring. The jig has a square corner, and can be pushed up against the origin. We then do the final adjustments in software, to tweak the exact starting location to get the earrings positioned exactly, in increments of 0.05-0.1mm. The final adjustments are needed as the jigs vary slightly based on how accurately we assembled them, and the current temperature as acrylic expands and contracts with temperature.

We do have a third way to do this! Some designs can bleed over the edge of the piece to be printed, and their exact positioning can vary slightly. Some examples of this is when we print a pattern on acrylic, or some images like paintings. For these ones, we can do a cut-print-cut method. What we will do is cut a rectangle of acrylic, and then print over this entire rectangle, and actually print 1mm bigger than what we intend the final size to be. After printing, we apply masking tape to the acrylic, and then put it back through the laser cutter again, this time to cut out the exact shape of what we need. This gives a beautiful finish for fully bled items; normally if we print over the edge of acrylic, some of the ink will run down the side, but by laser cutting afterwards, we remove this side ink.
The cut-print-cut method has a few limitations! We need to print primer first, as otherwise the printing will have defects after the heat of laser cutting. Secondly, the positioning accuracy is about 0.3-0.5mm, as each printer and the lasers are ever so slightly different in their calibration. We have ways to reduce the positioning error down to around 0.2mm with this technique, but for absolute accuracy, we normally use the SMP jig method.
Some other things that we print don't require such accurate positioning - if an error of 0.5mm is acceptable, the item can be pushed up against the origin position and it all works out!
The tiny little ink droplets that come out of the print heads are supposed to drop straight down onto the material that you're printing on. In a perfect world, this would happen 100% of the time. But in practice, as the heads are moving so fast over the bed that it creates air movements under the print head that can easily carry those droplets away.
In most cases, the printers have optimized this air flow to get almost all of the droplets in their intended location, and also contain things like mist catching fans to redirect the rest. But some of the droplets will invariably get carried away, and float off somewhere that you didn't intend for them to be. In some cases, they go back onto the print heads themselves.
Before, I mentioned that your home inkjet printers mostly had water based inks. So if the inks dry out on the head, it can block the nozzles. Printing more can help with this as the ink that comes through has water in it, and can dissolve the ink stuck on the print head. (Sometimes - it does depend on several other factors!).
UV printers are much more sensitive to this; if the droplets land on the print head, and it's then exposed to UV light, the ink can cure to the print head and permanently block parts of that print head. The solvent in the ink can't dissolve the cured ink; you need to use a specialized cleaning solvent for this, so it's not self cleaning like other types of printers and inks.
To work around this, there are few things we can do. The first is being careful of what we print on to stop the UV lamps from accidentally exposing the print heads. The first part of this is getting the print heads as close as possible to what's been printed on; this stops the UV light from reflecting into the print heads. The lamps have been designed and positioned to reduce this as much as possible. The second part is having any non-printable areas coloured black or a dark colour, with a matte surface, to absorb the extra UV light immediately and not reflect it. For this reason, the printer bed is normally a matte black surface.
This is also why we can't print onto mirror. Printing onto a mirrored surface allows the UV light to reflect through the mirror and onto the print heads, often permanently damaging them. Some companies will UV print onto mirror for you. They have accepted the damage that it will cause to their printer, and after some time, the print quality of those machines will drop until the expensive print heads are replaced. The Roland manual specifically prohibits printing onto mirror.
The second thing that we do is cleaning. Cleaning, cleaning, cleaning. The printer internally runs a cleaning cycle when the machine is turned on, and a small one after each print run. At the end of the day, or every 6 hours of continuous printing, we do a head refresh with a specialized unit that is supplied with the printer; this directly applies cleaning solution to the print heads to remove any ink that might have started to build up. We also run head refreshes if something went wrong during the print run, as a precaution against damage.
Every day when we start the machine, we do a test print that checks that all the nozzles are working correctly. The print test is designed to show this, and if it's not clear, we go through a checklist of cleaning cycles, each more aggressive than the last, until the problem is resolved.
Once a week, we do a manual clean on the heads and other components using a different cleaning solution, exactly as described by the printers manual. This cleans the sides of the heads, the head wiping system, and the caps that protect the heads when not in use.
Every 6 months, a dedicated Roland technician comes and services the machine. This involves cleaning less frequently used components, replacing the internal head wipers and filters, replacing the head parking caps to ensure they're air tight, and generally going over the machine to make sure it's in good working order.
Tiny quantities of dust can also get into the heads and affect them. We've built our own positive air pressure room around the printers to control dust. The room pulls in air through HEPA and carbon filters, and pressurises the area where the printers are kept, keeping the dust out of the room. Every week we check the filters, and clean or replace them as needed.
The printers have between 6 and 7 ink cartridges depending on the model. Each cartridge holds 220ml of ink that the printer pumps out as needed. Once empty, the cartridges are put aside and periodically sent back to the manufacturer for proper recycling and disposal.
The printer also generates waste ink, which is excess ink used by cleaning. Your home inkjet printer pipes this off to a small pad inside the machine to air dry, but we can't do that with the printer inks - they need to be handled and disposed of carefully. Instead, it's collected in a dedicated waste ink tank inside the printer. When this is partially full, it is placed into another sealed drum at the workshop. Periodically, we take this ink to our local waste management facility for appropriate disposal. It's all part of responsibly running a UV printer.
Once cured, the inks are actually very safe! Roland inks are Greenguard Gold certified, which means that once they are cured, they release no additional VOC (volatile organic compounds), which makes them suitable for items that you keep indoors at your home.
We use the UV printers to personalise a whole range of our products; in some cases just adding that finishing touch, and in other cases, creating something totally unique that we couldn't otherwise do.
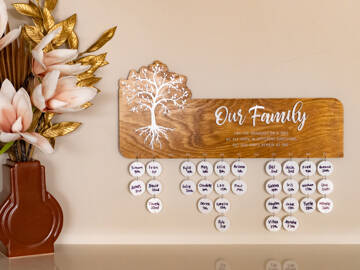
For example, our birthday boards just have the byline and the months added - the final touch to an existing product.
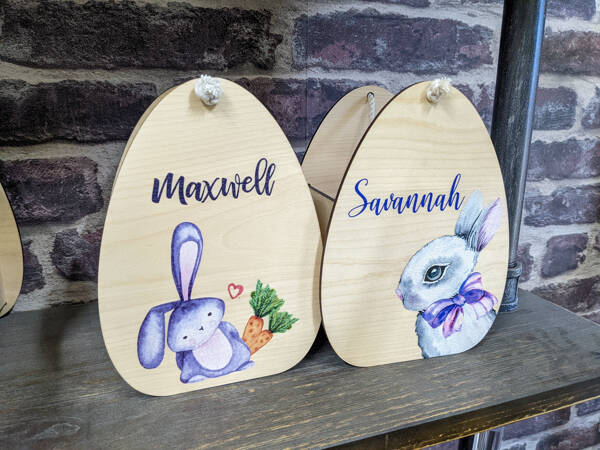
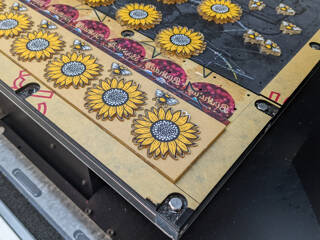
Or our flower presses are brought to life by the full colour printing that would otherwise not be possible:
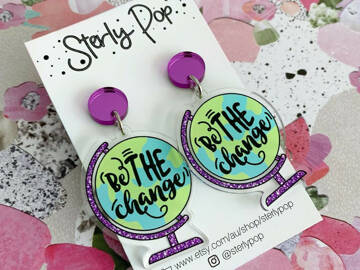
Or one of the most popular things that we make with our printers is earrings and earring components. The possibilities are limitless. We have our own designs that we've created, or we wholesale your very own range of designs for you, without you having to go to the expense or trouble of running a laser cutter and UV printer:
We're also learning new techniques and ways to do things better, and faster, and to improve the quality of our results!
Yep, that's us. We're almost annoying at times! We always check that we've got the right artwork to get the perfect result, and we're constantly keeping an eye on the quality of our printed products. We notice the slightest drop in print quality - sometimes the printer technician has a hard time seeing the faults - and will fix it long before you see it in your products.
We'll work with you to ensure that we've got the right artwork and that it's the right quality for printing. And advise on what we can practically achieve so you end up with the best possible result for your printing job.
Get in touch with us for your project, and we'll be more than happy to bring your vision to life, using the technology and techniques that we have on hand!
"Amazing quality product! Repeat customer who will always buy my cake toppers here as never fail to look special, arrive on time and wow my family and friends."